The team at teelaunch is simply in love with the new canvas prints and you should be too. The print quality is second to none, the build quality is top notch and the app makes creating for all sizes a breeze. What we have found, though, is many of our users find creating for large canvas prints difficult due to the size constraints we have placed in our uploader. We created specification limitations to avoid low resolution images/files from being uploaded. This may seem like a hurdle to some but it is in place to protect your store from customer complaints and return orders. We want your store to sell high quality products and we want to print products that will meet your customer’s standards.
We understand not everyone is a designer. We understand not everyone is well versed with design programs like Photoshop… We want to use this blog post to assist you in creating designs, but more specifically, designs for canvas prints. In this blog we will show you the proper way to utilize the templates supplied within the teelaunch app, design tools/elements that are free to use, and simple “tricks” to improve your designs. We will be referencing Adobe Photoshop throughout this blog as it is the industry standard for design software. Don’t let that scare you. Photoshop is now easily accessible (online download) and affordable ($9.99/mo) with free online assistance tutorials across the entire web. You can find the Adobe Creative Cloud version of Photoshop HERE with everything you need to create stunning designs at a low cost.
Let’s Get Started:
The Template
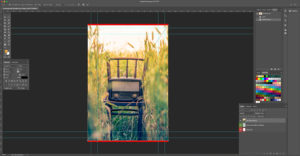
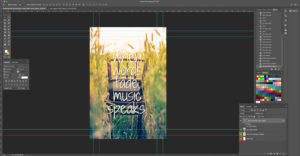
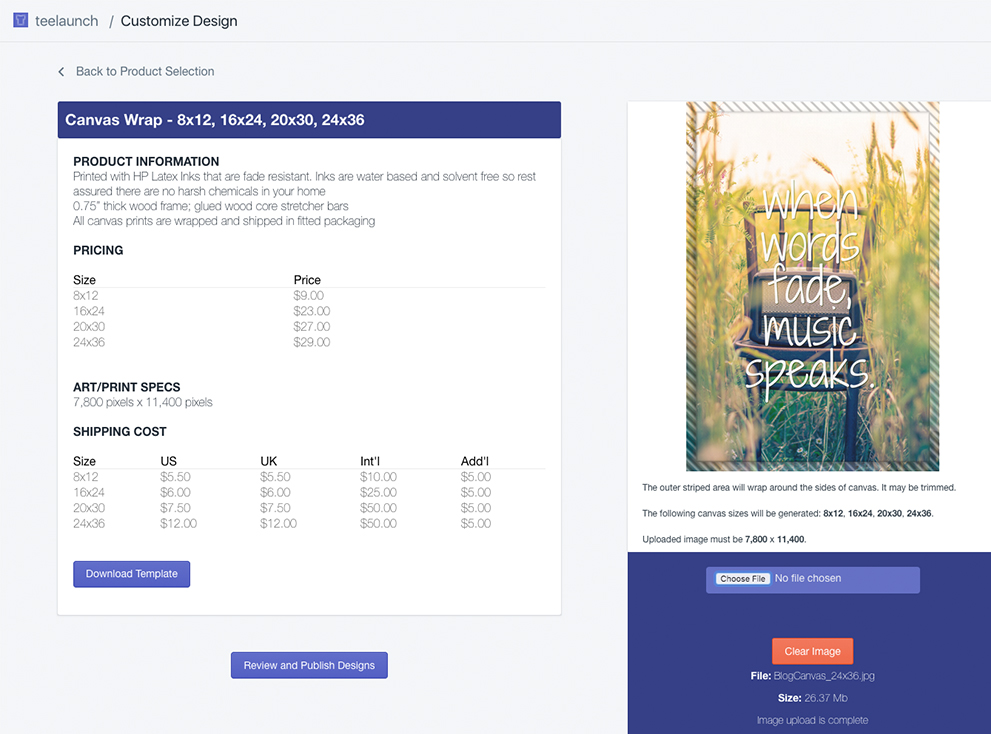
First we will go into the teelaunch app and select the Rectangle Canvas Wrap under the Wall Art products tab. We are going to create a rectangle canvas because this particular canvas wrap can be created in both vertical and horizontal orientation. Once we are in the Rectangle Canvas Wrap product upload screen, we want to download the template located under the shipping costs. The template is a PDF that can be opened with Photoshop. You will see that the the template is marked off with red, white, and green sections along with guide lines surrounding the green and white sections.
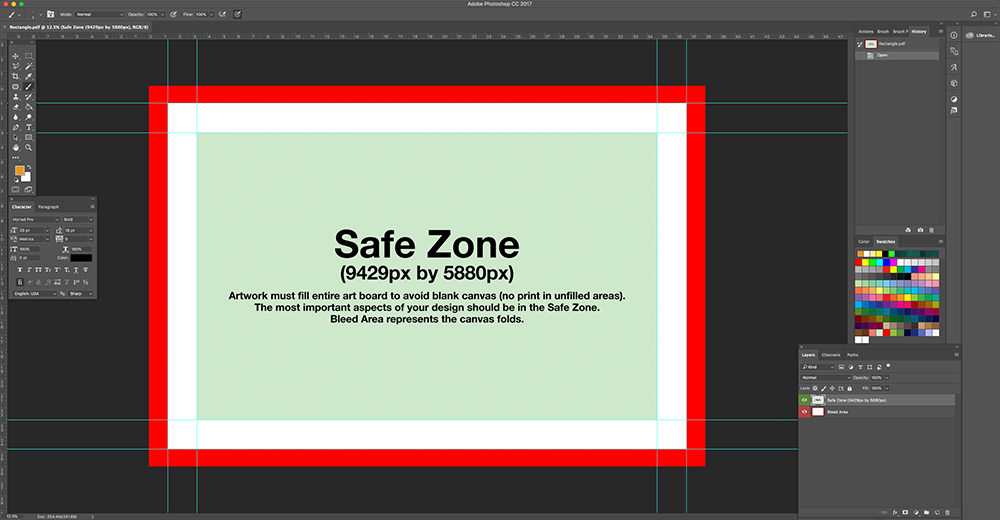
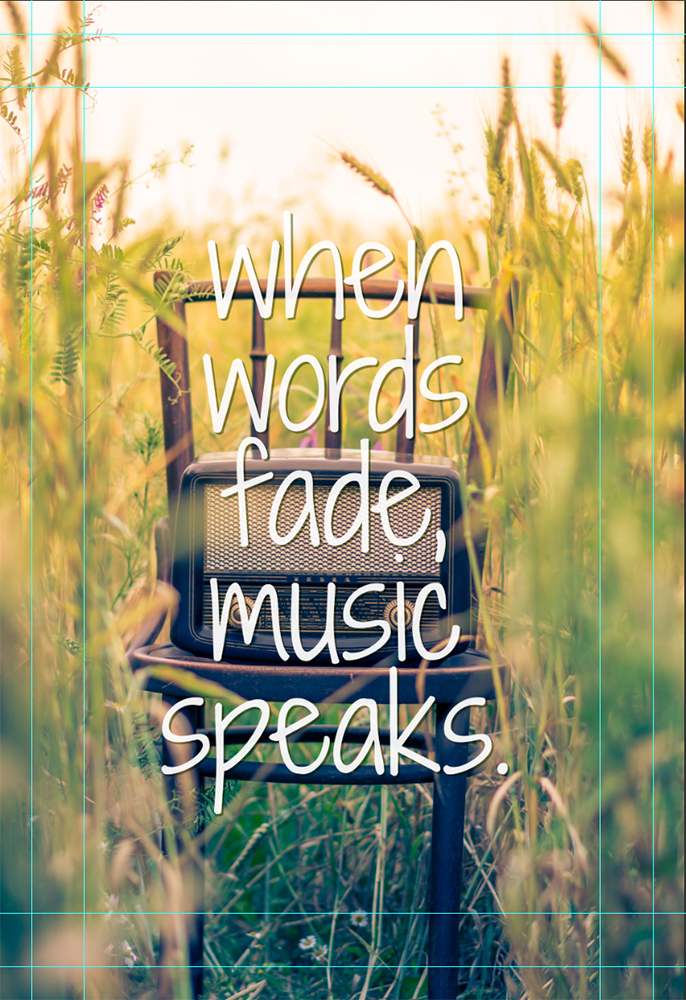
Bleed Area
The red portion indicates the Bleed Area of your art board (design area). The Bleed Area is important when creating your products because all of our sublimated product’s base color is white. If you do not want your product to show the white base layer (absence of ink/design) you must make sure your design covers the entire bleed area. The reason for a Bleed Area is to ensure the entirety of the product is covered and then some. Bleed Areas are typically larger than the product it is being printed on because errors occur during the cut or sew process. Think of your design as cookie dough and your product is the cookie. You’re at the very end of the cookie dough and have just enough for one last cookie. When you use the cookie cutter to make that one last perfectly shaped cookie, a little excess dough will fall outside of the cookie cutter. That is the excess bleed. If you do not fill the entire cookie cutter with dough, your cookie will not be perfectly shaped – thus the importance of filling the entire workspace with art.
Safe Area
The green portion indicates the Safe Zone. The Safe Zone is exactly what it sounds like – the zone where the most important aspects of your design are safe from being cut, sewn or folded under/behind. Typically text and logos are supposed to fall in the Safe Zone, but depending on the hierarchy of your design, other important aspects may need to fall within this zone as well. This is even more paramount when designing canvas prints. In order to simplify the canvas upload process, we have made it so the user only has to upload one image but we offer multiple sizes of canvases. The largest canvas is what you are designing for because you can scale down your file while maintaining a high quality print but cannot scale up without causing pixelation and poor resolution. When you upload your file, a print file is also created for the smaller canvas. The smaller a canvas becomes, the smaller the Safe Zone gets and the larger the Bleed Area gets. If you place important aspects of your design outside of the Safe Zone, the odds greatly increase of that portion of your design getting folded behind the front of the canvas as the size of the canvas goes down (24×36 canvas to 8×12 canvas).
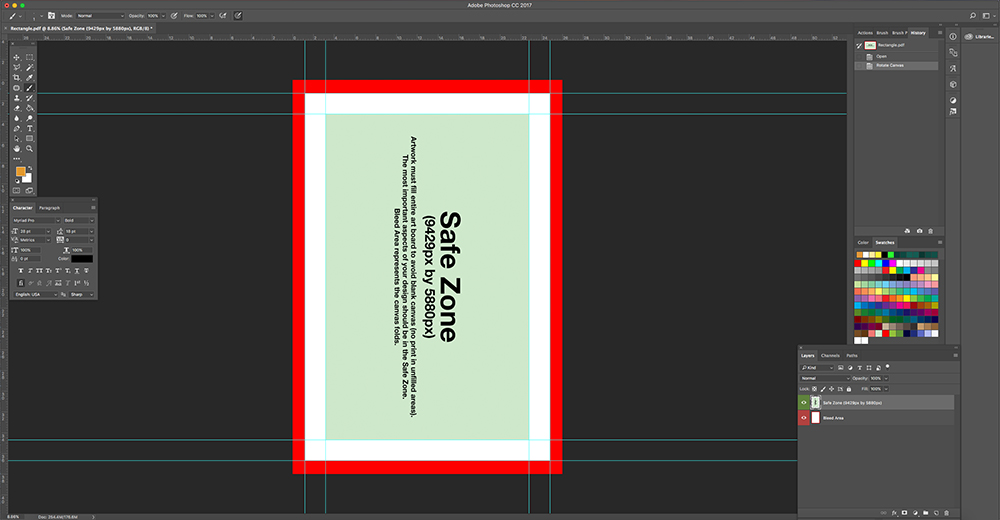
Now that we have an understanding of what each zone means and its importance, we will push on and rotate the template so it is vertical. If you want to rotate the orientation of your art board in Photoshop, you will need to go to Image on your menu bar at the top. Image<Image Rotation<90* Clockwise. Now that our template is vertical, we can start creating for a 24×36 (vertical) canvas whereas if we did not rotate the art board, we would be creating for a 36×24 (horizontal) canvas.
Free Artwork
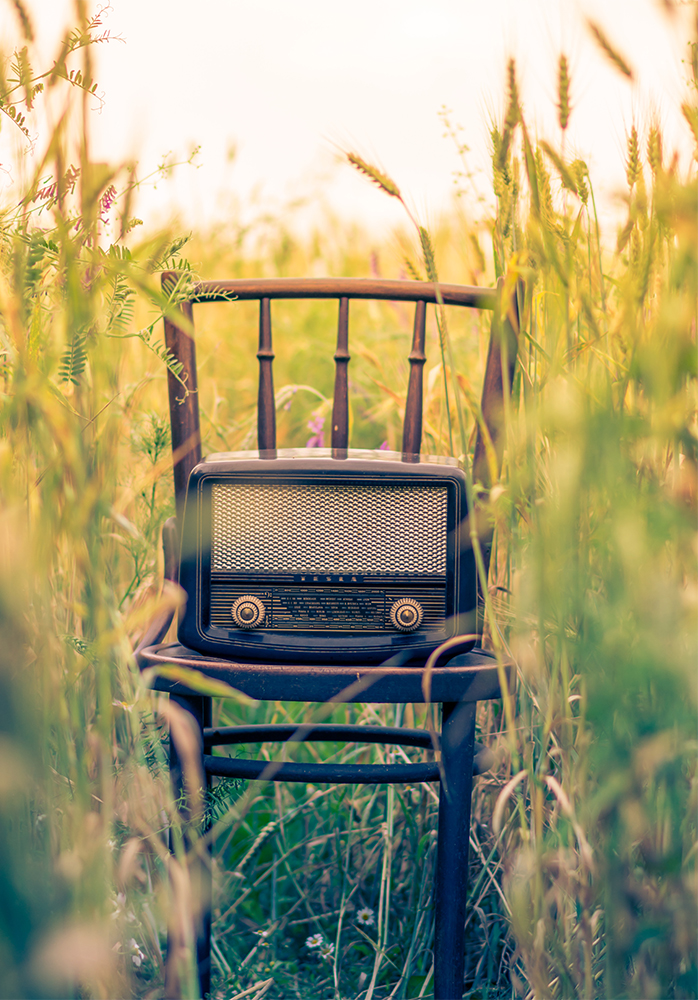
In this post, we will be utilizing the amazing photography site Unsplash. Unsplash is a site where talented photographers post the most beautiful hi-res photography that is free for the public to use. How awesome is that?! Before we started this blog, we found a gorgeous image of a vintage radio that fits the vertical orientation of a 24×26 canvas we wanted to create. After downloading the image, we want to place it in our template workspace. We prefer the method of dragging and dropping the image into the working template file. This will make the image a smart object which means no matter how large or small you scale you image to, it will refer back to the original file resolution. This is helpful when scaling down the file because you can scale back up without losing precious resolution. The file will also snap to fit the workspace so you can immediately see if the image is pixelated or not. In this case, the image snaps to fit the max width and most of the height of our design area. This means we must scale our design up to fill the entire art board. With the sizing box still surrounding our image, we will want to hold SHIFT+COMMAND (SHIFT+ALT on windows) while dragging a corner of the image to scale the image to fill the art board. Holding SHIFT or SHIFT+COMMAND when scaling ensures the aspect ratio of your image is maintained. SHIFT+COMMAND pulls from all 4 corners while SHIFT just scales one side or the other. If you do not maintain the aspect ratio, your image stretches rather than scales. This causes distortion with your image. You do NOT want that in most instances. The focal point of the image sits nicely in the center of our workspace which works well with our composition.

Making A Design Yours
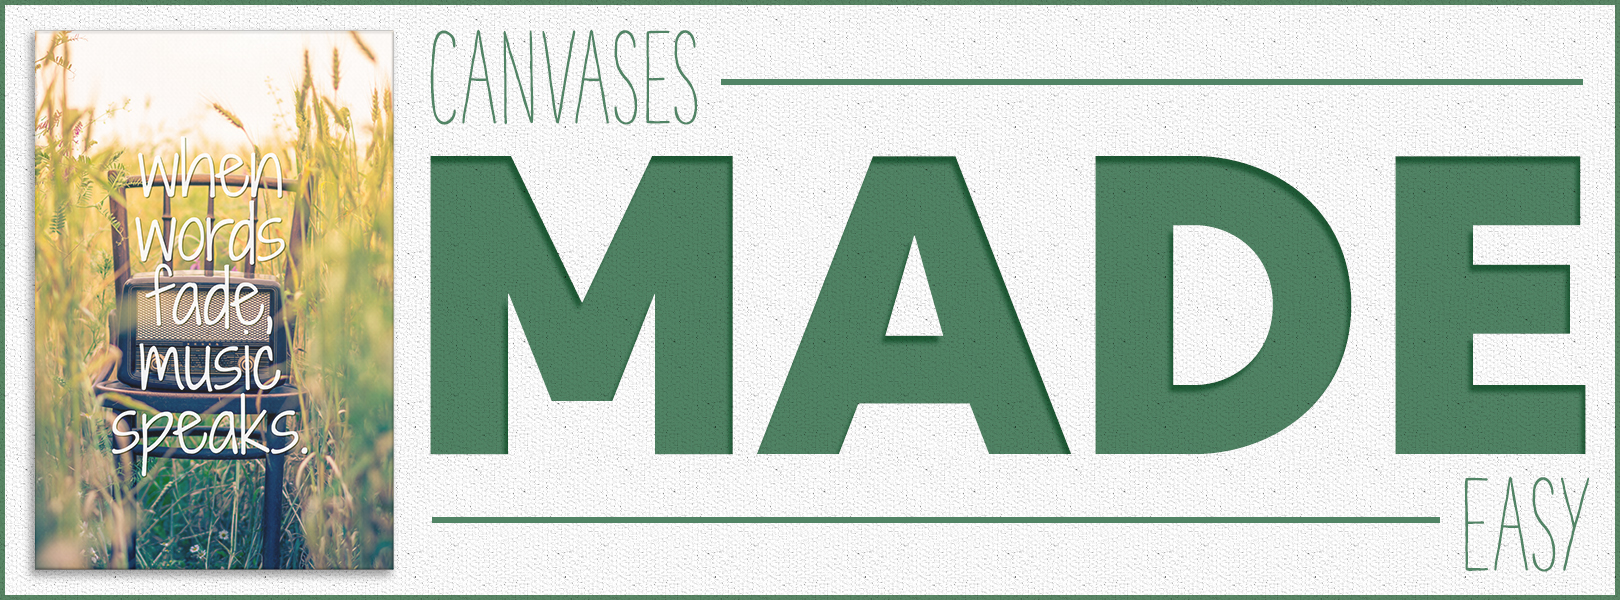
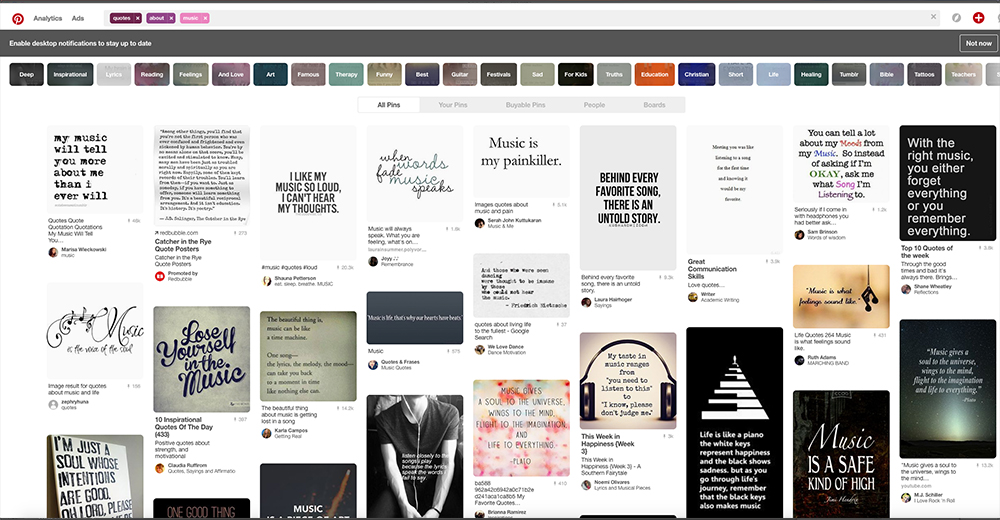
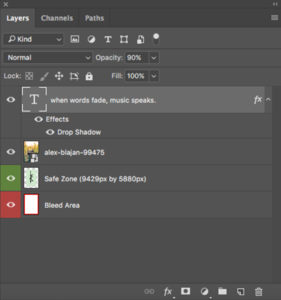
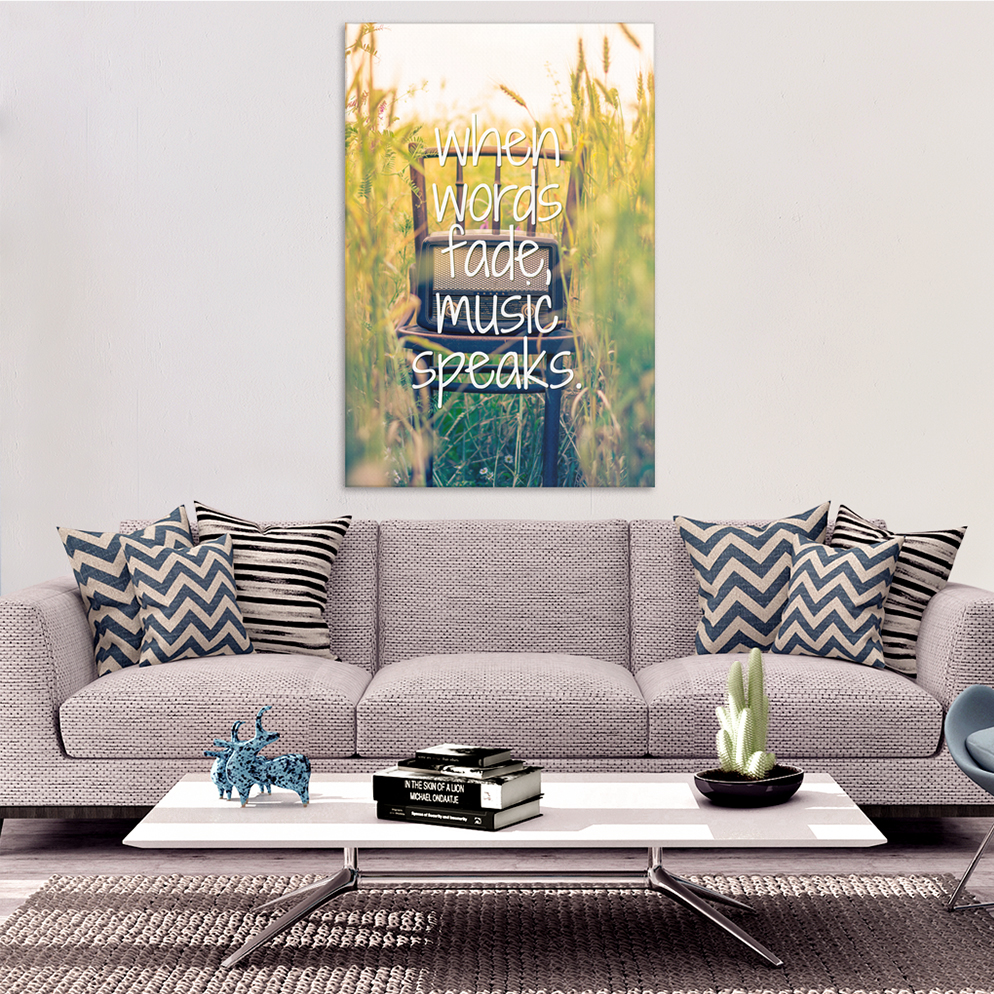
We saw the image of the radio and it inspired us. We knew we wanted to turn this image into a canvas, but didn’t know how to make it a one of a kind work of art worthy of our store. Not a problem… We can take advantage of the most inspirational site on the internet. Pinterest. With a quick search of “quotes about music” we have hundreds of inspiring quotes that will most certainly pair nice with the image we found. We decided to use the quote “when words fade, music speaks.”
Adding Text
For this project, we will use free Google Web Fonts to really bring this canvas to life. Google Web Fonts are fonts that are web safe and commonly used on sites throughout the internet. To stay in the same vein as the image we have chosen, we want to pick a font that lends itself well to the overall feel of the image as well as fitting the quote. We chose the font “Shadows Into Light Two” which is a free-flowing handwritten typeface that is trendy at the moment. Once you download and install the font you like, go back to Photoshop and type the quote in a new layer above the image with that font selected. This is the point where your design creativity gets to shine. You can experiment with text layout, size and color to really make an impact on your design. For simplicity sake, we decided to center our text and lay it out vertically while keeping it within the safe zone of the template. The guides on top of our art board make this easy to see without having to refer back to the original template layers. We then increased the size of our text, added a drop shadow and slightly lowered the opacity to soften the look a little.
Saving Your File
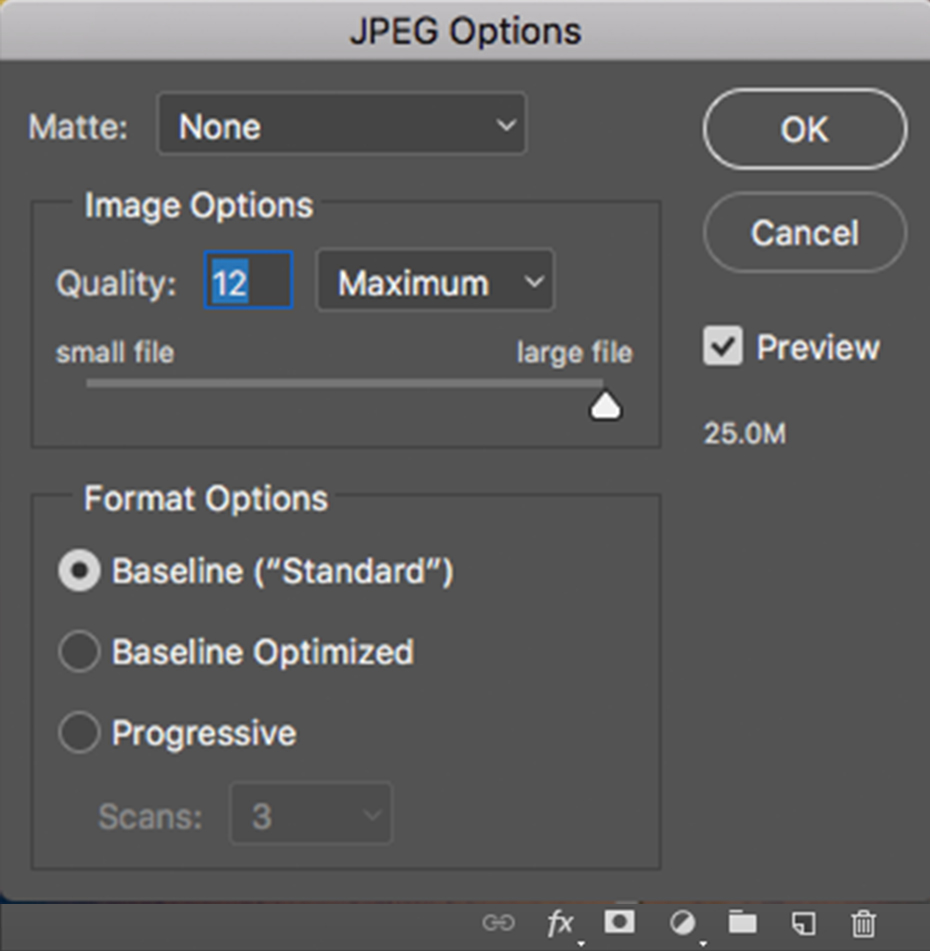
This blog is already chock full of information and may be a little bit overwhelming to some. There are many more enhancements you can make from adjusting colors to adding textures, but we are satisfied with the look of this canvas so we can now save our file. teelaunch has increased the file size limit for the new canvas wraps to 50mb which should be more than sufficient. We recommend saving your design as a Photoshop file (PSD) incase you need to refer back to the working file as well as saving a JPG to upload to the app. Saving a JPG flattens the layers of your artwork into one solid image which also compresses the file and reduces the overall size. This particular file happened to be 25mb, but if you ever encounter a file larger than 50mb, you can adjust the JPG options. When you save as a JPG, a pop-up window should appear label “JPG Options”. You can adjust the slider bar to lower the file size and see how many megabytes the final output will be. We recommend not going lower than the “HIGH” setting if avoidable as to maintain high quality resolution.
Now that your design is completed and saved, all that is left is to create the canvas in the teelaunch app. Simply open the teelaunch app within the backend of your Shopify store, select the “New Product” tab, go to “Wall Art” and select the “Rectangle Canvas Wrap” and upload your artwork. All that is left is titling your creation, setting your prices and publishing your product. You now have 4 canvases in varying sizes to sell in your store. Easy peasy.
There are many design assets out there that can greatly enhance the designs you add to your store. Your customers will take notice and you will reap the rewards in the form of sales and repeat business. Go on… Easily create some gallery wrap canvases today!