This week’s Design Tips & Tricks we’re going to look at how image resolution affects print quality.
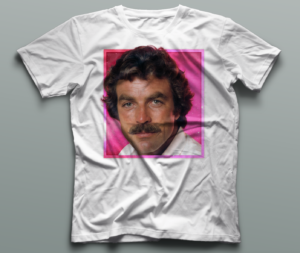
Have you ever downloaded an image from the internet and then printed it, only to have the results be less than you expected? The image looked great on your computer screen, but when you printed it, it either printed at the size of a postage stamp or it printed at a decent size but looked blurry or “blocky”? The issue, more times than not, is image resolution.
Images from the web are often small to begin with. This is for a few reasons – to allow a webpage to download faster and because images on the web do not need a high resolution to appear decent on a screen.

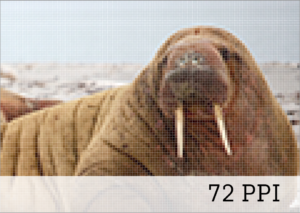
As a designer, I often receive files that are of low quality and the client who sent me the file thinks it should just scale up and be fine. This is not how resolution works. You can downsize a hi-res image and keep the quality intact, but you cannot increase the size of the image and achieve the same result. The larger you scale an image, the lower the quality of the image becomes. This follows the same premise as zooming into an image. As I’m sure you have noticed before, when zooming in on an image or scaling an image up, the image loses detail and becomes pixelated (blocky). This is because images are made of these little blocks called pixels.
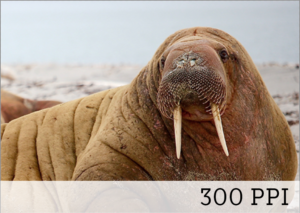
 Pixels are individual blocks of color that when sequenced to an image, make up the subject of the image. This is important to understand because when talking about image resolution, you are talking about the amount of pixels in your image file. PPI (pixels per inch) or DPI (dots per inch) represents the amount of pixels per inch of the image file. 72 PPI is the standard for web images and 300PPI is the standard for printed images.
 Obviously, the higher the PPI, the larger the file becomes. Also, you cannot take an image that is 72PPI and convert it to 300PPI and expect it to become a clearer more detailed image – as mentioned above about increasing resolution. If an image is of low quality, unfortunately there is little to no chance of increasing the detail.
The best practice when using images or creating artwork is to use the best quality of image as possible. You can always downsize your image and maintain the integrity of the file. When designing for teelaunch products, I like to start from the largest product, and scale my design down to the smallest product. During this process, I like to keep my working design file with layers intact. I keep the design file because not every product is the same size or shape, this allows me to adjust accordingly to the product I am designing for, rather than trying to make a square peg fit into a round hole so-to-speak.
Next Week: Bitmap & Vector graphics
- As a general rule digital pictures and scanned images are bitmap files. These are sometime also called raster images. Bitmap graphics are made up of the previously mentioned pixels and have size limitations.
- Drawings made in applications like Adobe Illustrator or Corel Draw are saved as vector graphics. Vector graphics are made of shapes and can be scaled to virtually any size imaginable without losing detail.
