THE IMPORTANCE OF THE PRINT TEMPLATE
The templates for the cutting boards are set up to display the entire “print” area. When artwork is uploaded into the app; it is not scalable – this is why it is important to use the template provided to help determine the size and placement of your artwork.
THE LASER ETCHING PROCESS
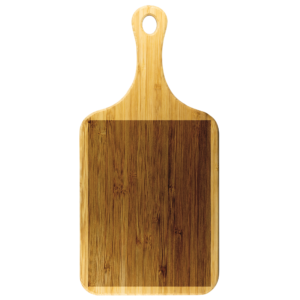
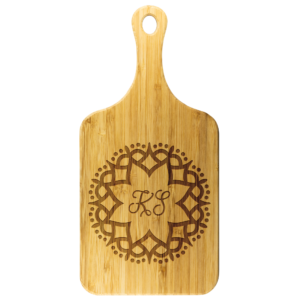
The designs on wood cutting boards are NOT printed on to the actual product. The designs are actually laser etched. The laser process consists of a laser etching and burning the design into the wood of the cutting board revealing your design in a dark rustic color and at a lower depth from the surface.
DESIGN TIPS
Designing for wood cutting boards is quite different than designing for DTG (standard apparel) or Sublimation (Tote Bags, Blankets, etc.) printing. You have to change your way of thinking. No longer can you think in terms of colors but you must think more in terms of positive and negative space. Where ink would usually be laid for your graphic, now will be etched into the wood. In turn, the areas where there is no graphic, the initial surface will remain. Below are some tips on how to properly create your designs and what to avoid.
1.) Utilizing Transparency: You must upload a graphic that has transparency within it. If you were to upload a PNG file that has a solid background, you will quickly notice that your mockup file will display a solid box where your design is supposed to be. This is because there is no transparency in your design. If there is no transparency the laser will etch the entire “print” area because it only recognizes where there are pixels in a design and etches the wood that occupies where those pixels reside on the cutting board.


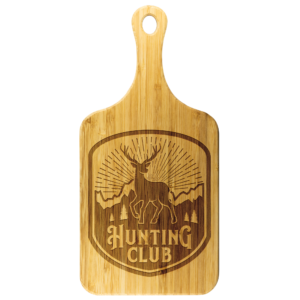
Graphics that use a healthy mix of positive and negative space or design vs transparent space tend to look the best. Since there are really only two colors in play (the surface color and darker etched area), creating artwork that breaks up the two colors adds more dimension to the final product.
2.) Create Artwork In One Solid Color: Creating artwork in one solid color will better help you visualize how you want your final design to turn out. Gradients, textures, shading, shadows, and other special effects will not appear on the cutting board when etched. Design elements that utilize opacity changes will also not work. The laser only etches to one depth so if you are trying to add layers of depth in your design, the final results will be less than ideal. Creating artwork with one solid color is the best approach to achieving an end result of realistic expectations.
3.) High Resolution Graphics: Using high resolution artwork is a MUST for all designs, but may be even more crucial for the laser etching process. Unlike products such as blankets, there is no fleece material to hide imperfections from the laser. If you submit pixelated artwork, the laser will pick up on this and etch out a jagged graphic. Vector graphics and solid line art work the best.
4.) The Simpler, The Better: Laser etching lends itself to simple bold designs. Artwork with fine detail does not turn out ideally nor does it hold up over time. In order for your design to be impactful it is good practice to simplify otherwise “busy” elements. As mentioned before, adding a good mix of positive and negative space within your design will also help add dimension and give an otherwise “plain” design a more dynamic presence.
5.) Size Matters: Due to the designated design area on the cutting boards, the size of your artwork plays a big part in the end result of the product. In more situations than not, going bigger is better for the laser process. Small text may become hard to read. Small thin lines may get lost. Small fine details can cluster and merge together. The mockup images are a representation of how the final product will look – it is not always an exact replica of the real deal. Errors can occur and the best way to avoid this is to make your graphic bigger and bolder so there is no doubt that the laser will etch the desired areas.
On a similar note, it is important to understand that wood products are never going to be identical. The grain and knots in the wood will almost certainly be different than the mockup image that is created. The mockup images are only a representation of the final product so it is up to you to use your best judgement when uploading artwork. We strongly suggest ordering a sample with one of your designs so you can see what works and what does not work first hand.