
The new teelaunch Designer tool gives print-on-demand sellers more freedom and flexibility when creating products.
With a wider range of editing features built directly into the app, you can upload artwork, arrange multiple design elements, adjust positioning and prepare production-ready files without constantly switching between different platforms.
From resizing and rotating artwork to managing layers, aligning design elements and generating high-resolution mockups, the updated Designer makes it easier to create and manage print-on-demand products from one place.
Here is a complete tour of the new teelaunch Designer and the tools available throughout the product creation process.
Upload Artwork Your Way
The first step in creating a product is adding your artwork.
Inside the Designer, you can:
- Upload new artwork directly from your computer
- Select artwork from your existing teelaunch gallery
- Review the recommended artwork specifications and best practices for the product you are creating
The central artboard shows the printable design area for your chosen product. This is where you can position, resize, rotate, and arrange every element of your design.
The new Designer allows you to upload artwork at any specification and move it freely within the artboard. This gives you more flexibility when adapting existing designs or building something new directly in the designer.
Build Designs with Multiple Elements
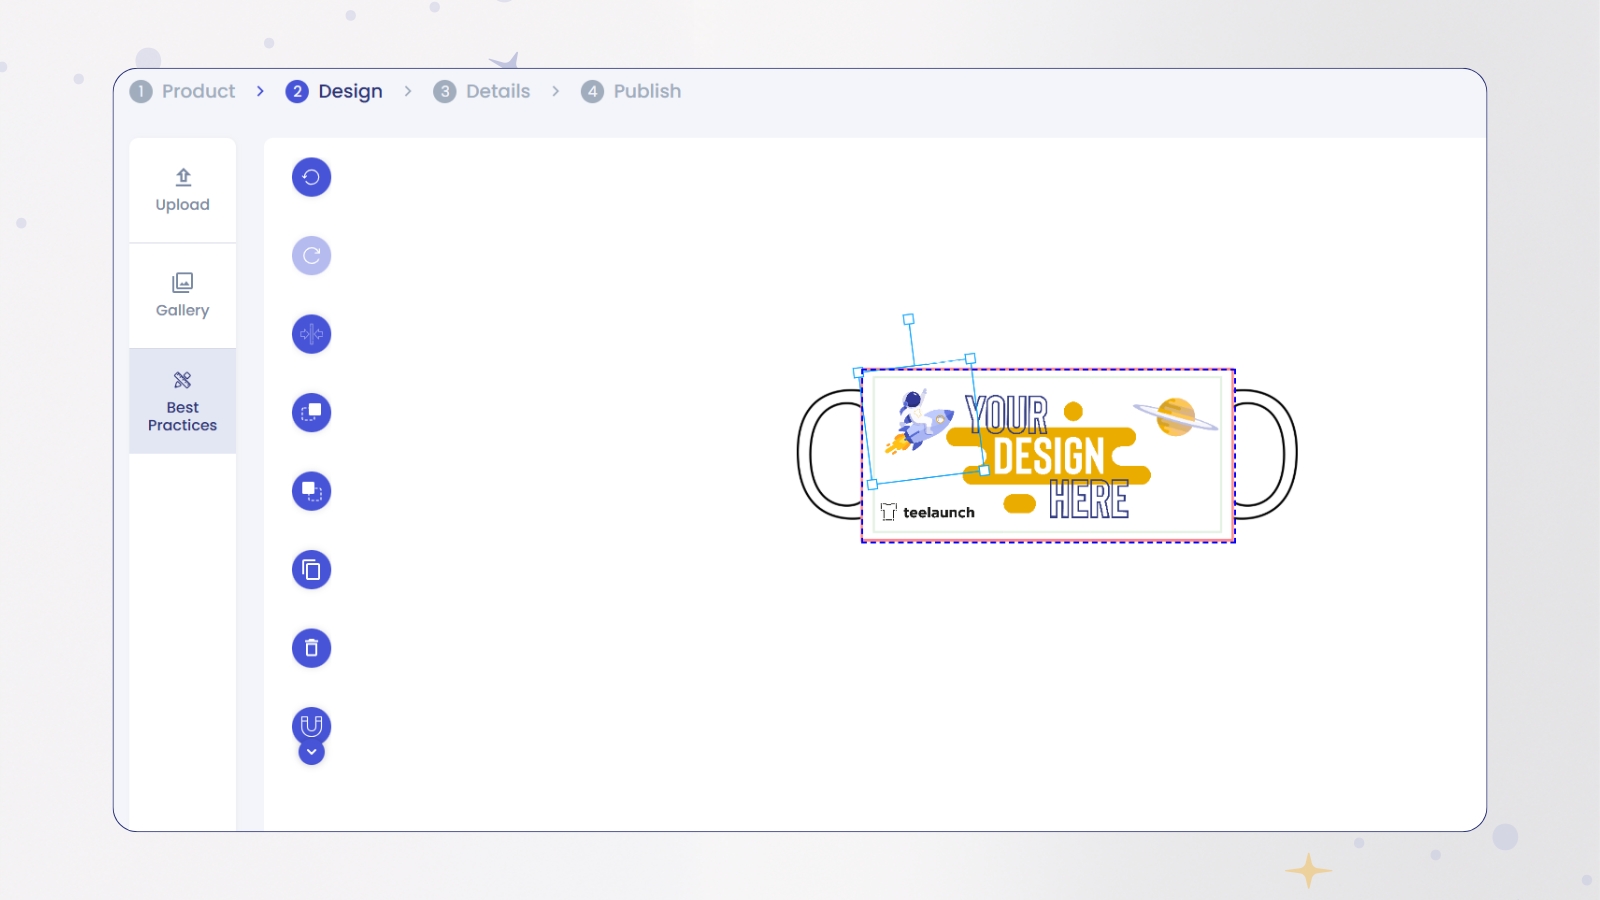
The new teelaunch Designer allows you to upload and combine multiple design elements on one artboard.
For example, you could create a design using:
- A background graphic
- A text-based design
- Decorative icons
- Shapes or illustrations
- Additional branding elements
Each element can be moved and edited independently, giving you more freedom to create complete product designs directly within the designer.
Unlock More Design Tools
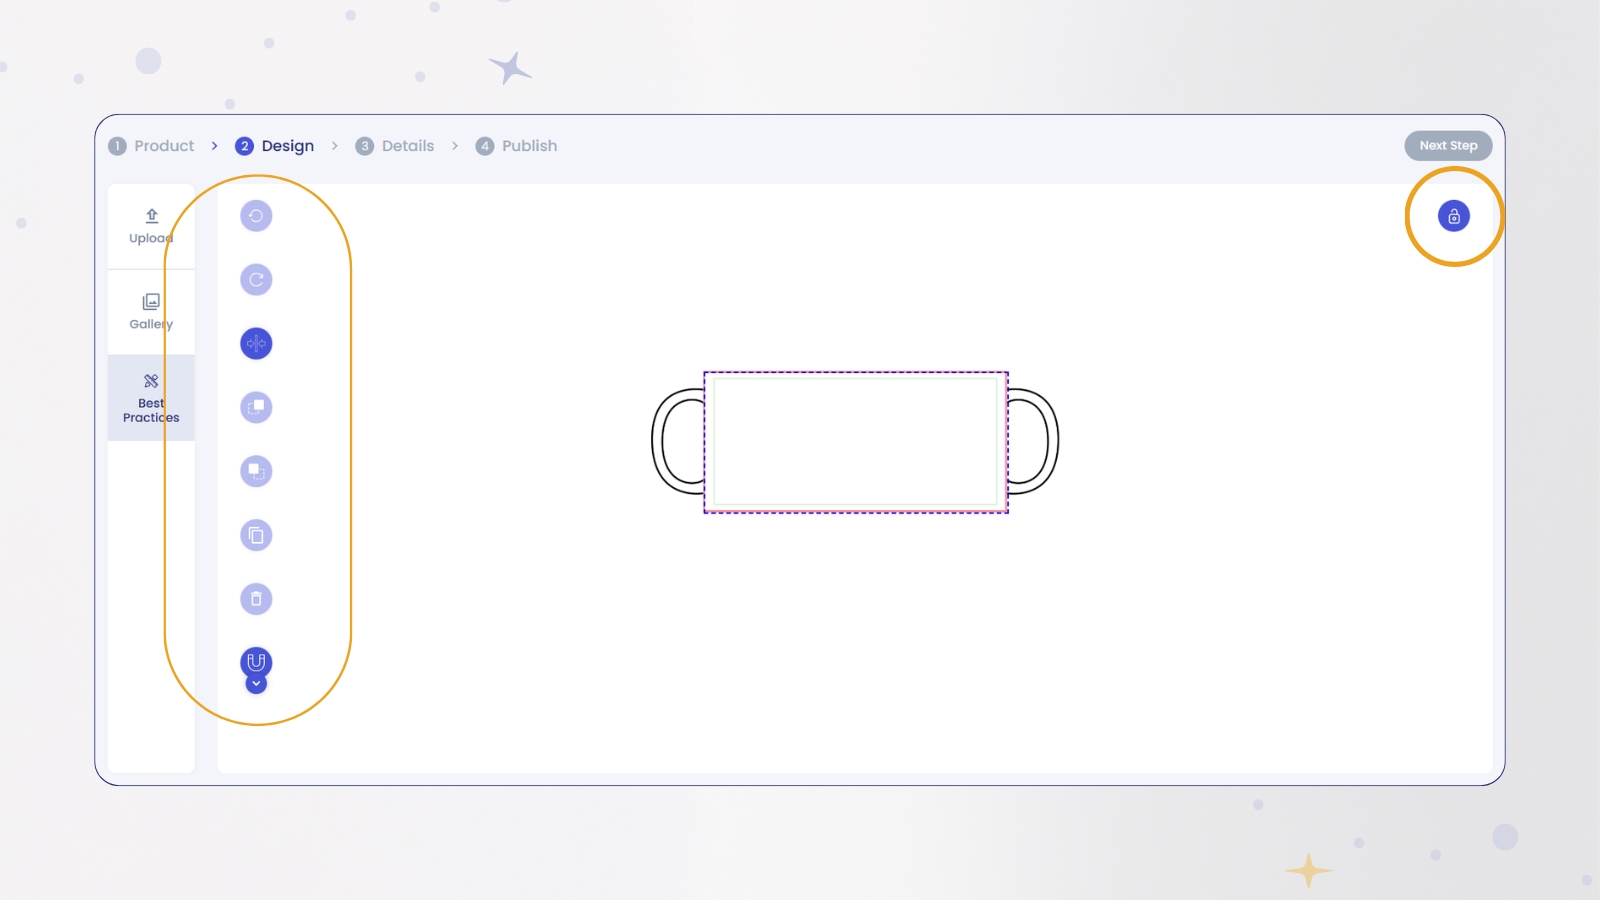
The lock icon gives you access to the Designer’s expanded editing tools.
Once unlocked, you can use:
- Undo
- Redo
- Constraints
- Bring to Front
- Send to Back
- Duplicate
- Delete
- Snapping
- Guidelines
- Rotate
These tools give you greater control over your artwork while keeping the product creation process straightforward.
Undo and Redo Changes
Mistakes and last-minute design changes are part of the creative process.
The Undo tool reverses your most recent action, whether you have moved, resized, rotated, or adjusted an element.
Changed your mind again? Select Redo to restore the action.
This makes it easier to experiment with different layouts without worrying about permanently losing your previous positioning.
Keep Artwork Inside the Print Area with Constraints
The Constraint tool helps prevent artwork from accidentally moving outside the printable design area.
When constraints are enabled, you can move your artwork up, down, left, or right, but the element will remain within the boundaries of the artboard.
When constraints are disabled, artwork can move freely beyond the print area.
There may be times when you deliberately want part of a design to extend beyond the artboard, particularly when creating full-coverage artwork. For designs that need to remain completely visible, enabling constraints provides an additional level of control.
Arrange Artwork with Bring to Front and Send to Back
When a design contains multiple elements, their order determines which graphics appear in front and which sit behind.
Select an element and use Send to Back to place it behind the other artwork on the artboard.
To move it above the other elements again, select Bring to Front.
These layering tools are particularly useful when combining backgrounds, text, decorative graphics, and overlapping artwork.
Duplicate Design Elements
The Duplicate tool creates an identical copy of the selected design element.
This can help when creating:
- Repeating patterns
- Balanced layouts
- Matching decorative elements
- Multiple versions of the same shape or icon
After duplicating an element, you can move, resize, or rotate it to create variation while maintaining a consistent design style.
Rotate Artwork Manually or Set an Exact Angle
Artwork can be rotated manually by selecting and turning the element directly on the artboard.
For more precise control, use the Rotate tool to apply a specific angle.
This makes it easier to create evenly arranged patterns, angled text, mirrored layouts, or decorative compositions without relying entirely on manual positioning.
Remove Unwanted Elements
To remove an element from your design, select it and click Delete.
Only the selected element will be removed, allowing you to continue editing the rest of the design.
The Undo tool can also restore the element when something is deleted accidentally.
Align Artwork with Snapping and Guidelines
Correct alignment can make a significant difference to the finished product.
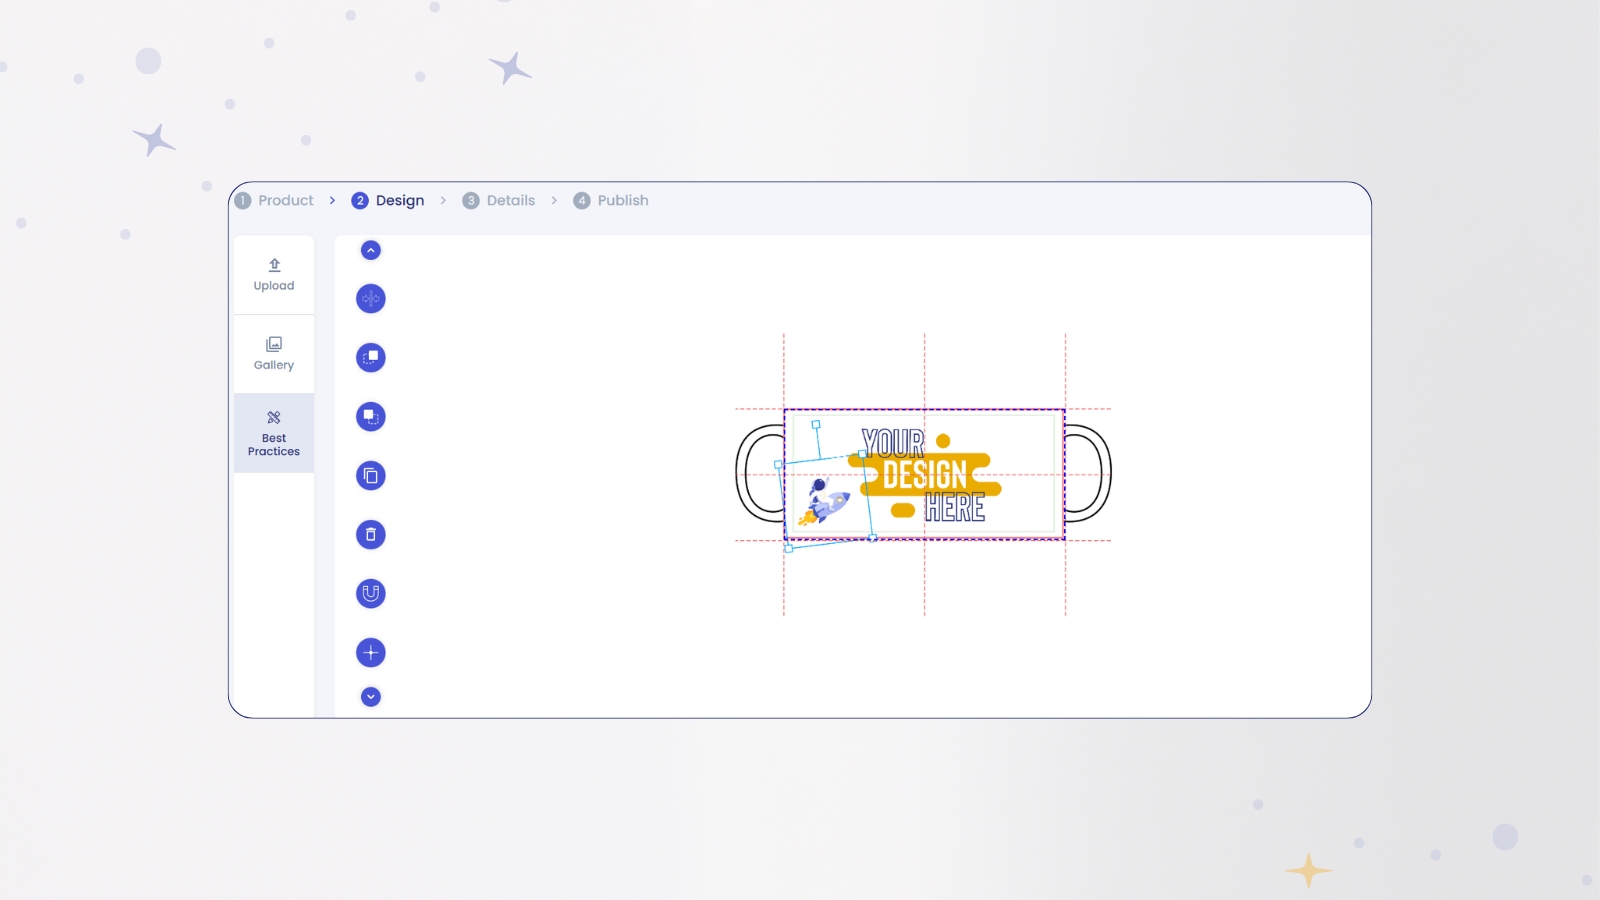
When Snapping is enabled, the Designer displays alignment indicators as you move artwork around the artboard. These guides help you identify when an element is positioned centrally or aligned with another part of the design.
The Guidelines tool displays crosshairs across the artboard, showing its exact horizontal and vertical centre points.
Together, these tools make it easier to create balanced layouts and position artwork accurately within the print area.
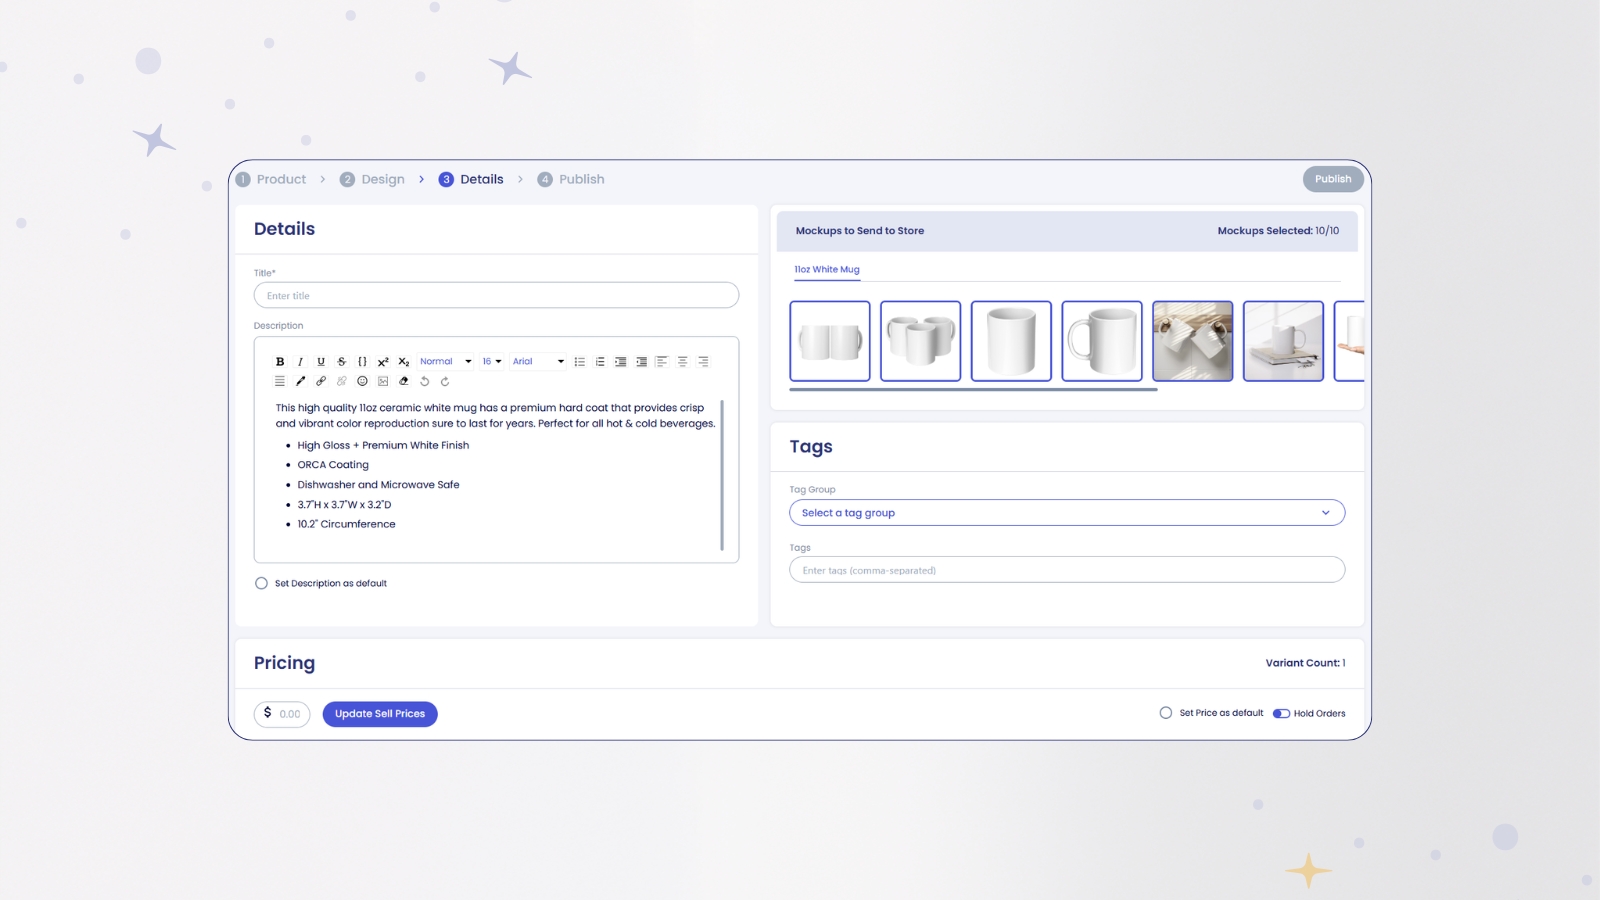
Add Product Details, Mockups, Tags, and Pricing
Once the artwork is complete, you can continue building the product listing within Launchpad.
The next stage allows you to review and manage important product information, including:
- Product details
- Mockup images
- Listing tags
- Product pricing
Choose Where to Publish Your Product
When the product information is ready, continue to the Publish page.
Here, you can choose:
- The ecommerce platform you are selling through
- The connected store you want to publish to
Sellers with multiple connected stores can select the most appropriate store for each product.
You do not have to publish the product immediately. Products can still be created and saved within Launchpad, allowing you to access the artwork and listing assets later.
This is useful when preparing product launches in advance or when you want to download the product assets for use elsewhere.
What Happens After You Create a Product?
After the product has been created, teelaunch begins generating the files required for production and marketing.
These files are organised into three main categories: art files, print files, and mockup files.
Art Files
The art file is the artwork that was uploaded and arranged inside the Designer.
It reflects the design as it was created on the artboard, including the positioning and arrangement of the individual elements.
Print Files
The print file is the production-ready version of the design.
This is the file that is sent to production and printed onto the physical product before the order is shipped to the customer.
Depending on the product, the print file may look slightly different from the original art file. This is because it has been prepared according to the specific production requirements of the product.
Mockup Files
Launchpad also generates realistic product mockups using the completed design.
These mockup images show the artwork placed on the selected product, including realistic:
- Artwork positioning
- Product colours
- Textures
- Product details
The mockups are generated as high-resolution images and can be downloaded for use in product listings, social media posts, advertisements, emails, and other marketing materials.
Create More Flexible Product Designs in teelaunch
The new teelaunch Designer gives print-on-demand sellers more freedom to create, edit, and manage product artwork from one place.
With flexible artwork uploads, multiple design layers, alignment tools, precise rotation, realistic mockups, and production-ready print files, teelaunch supports more of the product creation process from the initial design through to publishing.
Whether you are adapting an existing piece of artwork or creating a complete product design using multiple elements, the new Designer provides the tools you need to prepare products for your store.
Start exploring the new teelaunch Designer and create your next print-on-demand product.
What is new in the teelaunch Designer?
The latest teelaunch designer update allows sellers to upload artwork, arrange multiple design elements, edit their positioning, and prepare products for production and publishing.
Can I upload multiple graphics to one product?
Yes. Multiple artwork elements can be uploaded to the same artboard. Each element can be independently positioned, resized, rotated, duplicated, layered, or deleted.
Does teelaunch create product mockups?
Yes. After a product is created, teelaunch generates high-resolution mockup images showing the design positioned on the selected product.
What is the difference between an art file and a print file?
The art file represents the design created inside the Designer. The print file is the production-ready file that is sent to be printed onto the physical product.